Installing Thin Brick Veneer: A Step-By-Step Guide
Installing thin brick veneer is a great way to achieve the timeless beauty of brick with added versatility and ease. Whether you're upgrading an interior accent wall, enhancing an exterior façade, or tackling a DIY project, thin brick veneer offers a lightweight and durable solution. In this step-by-step guide, we’ll walk you through everything you need to know about installing Glen-Gery thin brick—from surface preparation to finishing touches—so you can create a stunning, professional-looking result.
Before you get started, determine the total square footage of your project. Use Glen-Gery’s brick calculator tool to find the amount of brick needed based on wall area, the wall area your quantity of brick will cover, and even the estimated price per square foot and price per thousand pieces based on your wall area and budget.
Step 1: Prepare the Wall
- If necessary, install water-resistant drywall, cement board, or tile backer board.
- Ensure the wall is secure; do not apply thin brick to wallpaper, smooth tile, or damp surfaces.
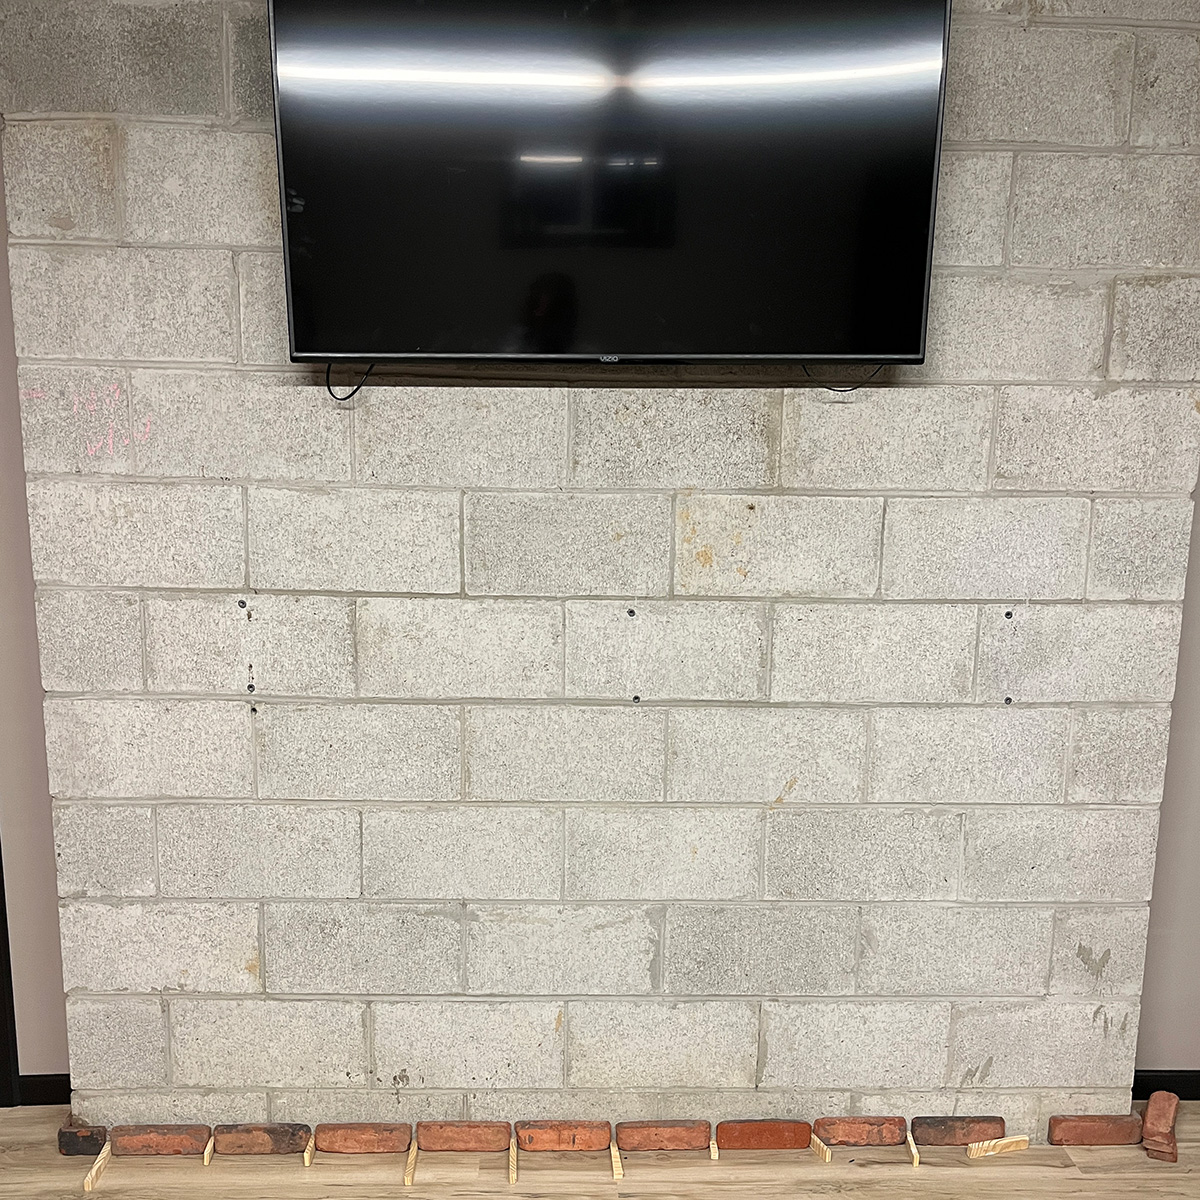
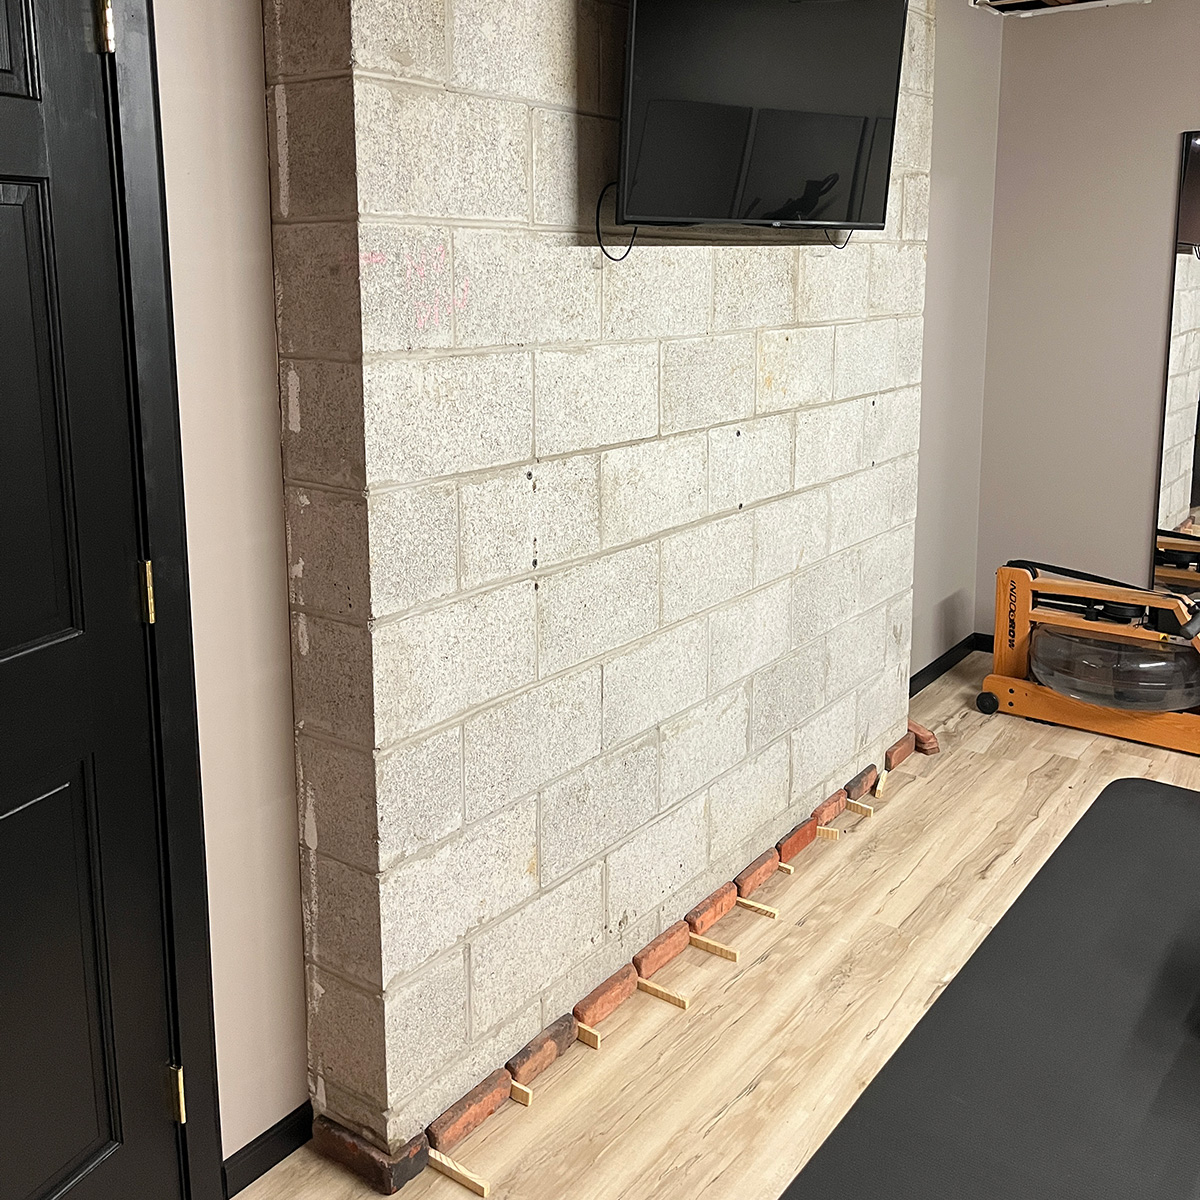
Step 2: Plan Your Layout
- Mark horizontal chalk lines based on brick height + 3/8" mortar joint. 3/8” is the standard for brick installation, but can be adjusted for aesthetic preferences.
- Lay out bricks at the base to check for necessary cuts.
- Adjust brick spacing slightly to minimize cutting.
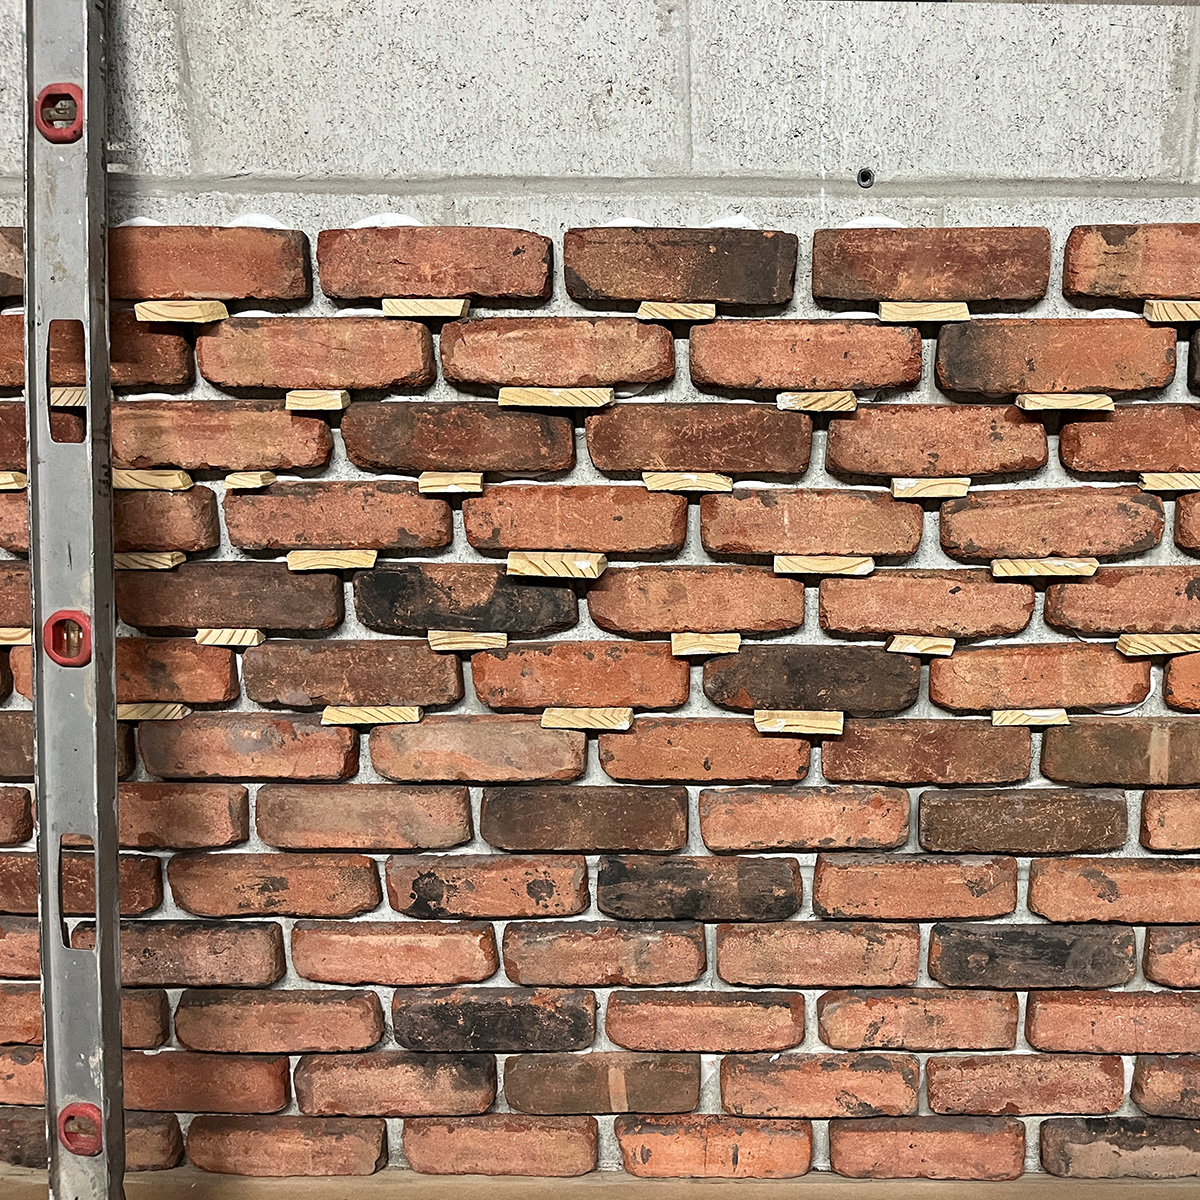
Step 3: Install Thin Brick
- Start with corner bricks, alternating long and short legs.
- Apply non-sag adhesive (1/4"-3/8") to the back of each brick and press firmly onto the wall. Reminder: 3/8” is the standard for brick installation, but can be adjusted for aesthetic preferences.
- Leave 3/8" between bricks for mortar.
- Stagger bricks in a running bond pattern, or explore other brick patterns.
- Cut bricks as needed using a masonry blade or wet saw.
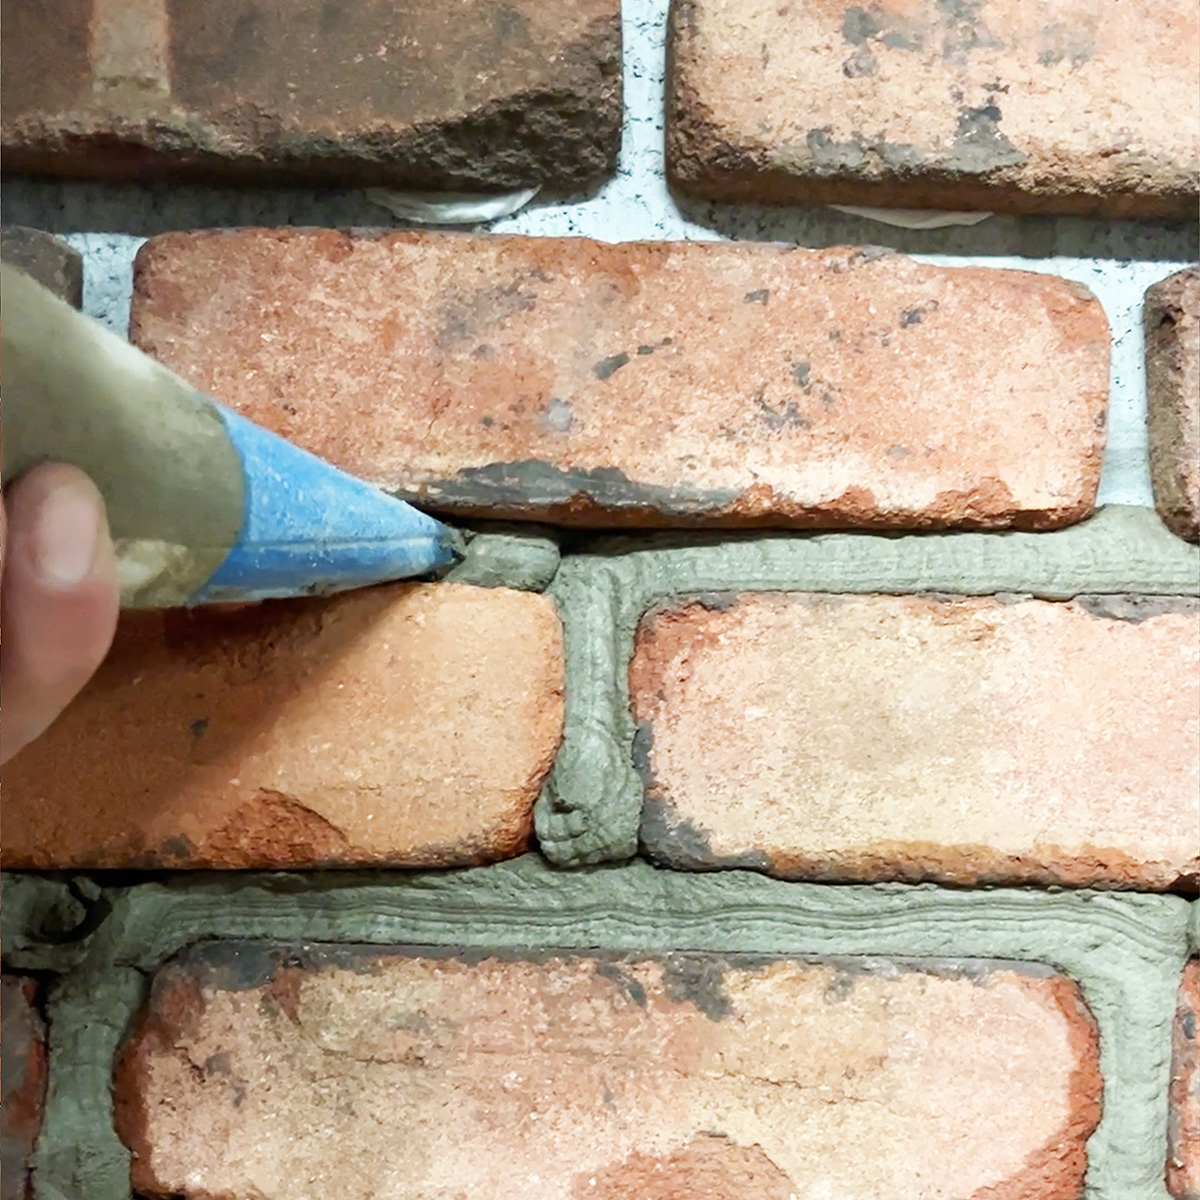
Step 4: Fill Joints with Mortar
- Mix Type N mortar and fill a grout bag halfway.
- Start at the base, filling horizontal joints first, then vertical.
- Clean excess mortar from bricks immediately with a stiff fiber brush.

Step 5: Strike the Joints
- Let mortar firm up until it crumbles like dry sand.
- Use a concave jointer to smooth joints (vertical first, then horizontal), or explore other mortar and joint techniques.
- Brush off excess mortar and avoid wire brushes to prevent scratches.
- Now, clean up and enjoy your new brick wall!